
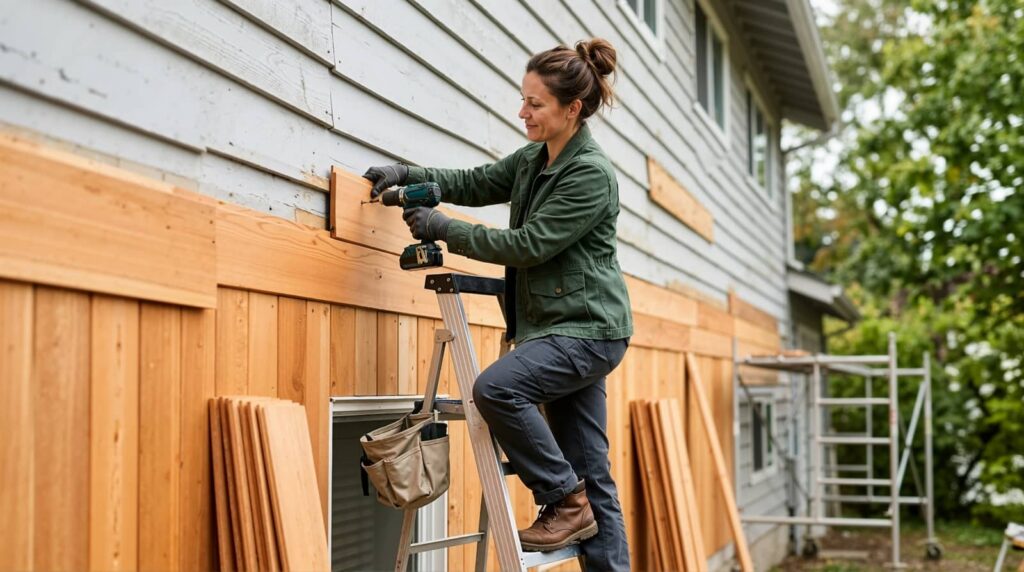
You install new siding, and a month later you spot a bowed panel near a window. That usually means a mistake in nailing, spacing, or flashing, and it can lead to leaks, warped boards, and lower energy performance. When you know where installers go wrong, you can catch problems early and avoid costly repairs, so the details around gaps, wraps, and trim matter more than you might think.
Key Takeaways
- Poor moisture management can trap water, causing hidden decay, warped siding, and reduced energy efficiency.
- Incorrect nailing or overdriven fasteners can buckle panels, create gaps, and weaken the siding system.
- Missing flashing and poorly installed house wrap allow moisture intrusion around windows, doors, and seams.
- Incorrect gap spacing and uneven alignment can stress siding, distort courses, and hurt curb appeal.
- Inspect every course for straightness, secure fastening, sealed openings, and proper seam staggering before finishing.
Why Siding Installation Mistakes Hurt Your Home
Even small siding installation mistakes can create big problems for your home because they let moisture, air, and pests get where they don’t belong. When you miss proper flashing, spacing, or fastening, you reduce your siding’s ability to protect your walls and insulation.
That can lead to warped panels, hidden decay, higher energy bills, and repairs that keep adding up. You also lose curb appeal, which can make your home feel less cared for and less welcoming.
By understanding common siding installation mistakes, you can spot trouble early and make better choices for your project. Stay alert during every step, ask questions, and work with installers who follow manufacturer guidelines.
This helps you protect your home and stay confident in your community.
Most Common Siding Installation Errors
The most common siding installation errors usually show up in a few predictable places: poor moisture management, incorrect nailing, improper gap spacing, and missed flashing around openings. When you rush these steps, you trap water, warp panels, and weaken the whole system.
You should keep fasteners centered and snug, not overdriven, so the siding can move naturally. You also need consistent clearances at ends, corners, and trim to prevent buckling. If you cut pieces too tight, you’ll see stress fast.
Check every course for level alignment, because small mistakes stack up quickly. When you install with care, you protect your home and join the group of owners who get durable, clean-looking results.
Why Flashing and Wrap Details Matter
Flashing and house wrap work together to keep water out of vulnerable joints, seams, and wall cavities. When you install them correctly, you protect your siding, framing, and insulation from hidden moisture damage. That means fewer repairs and a home that feels cared for.
Lap wrap shingle-style so water drains downward.
Seal openings around windows, doors, and penetrations.
Extend flashing so it directs water away from trim and sheathing.
You should inspect overlaps, tape seams only where the manufacturer allows, and keep every detail aligned with the drainage plane. Small mistakes here can trap moisture behind the siding and shorten the wall’s life.
When you pay attention to these details, you join the group of homeowners who build with confidence and protect their investment.
Wrong Fasteners and Spacing Problems
You need the right fasteners for the siding material, because the wrong type can loosen, rust, or damage the panels.
Space each fastener exactly as the manufacturer specifies so the siding stays secure and can move as designed.
Keep nails and screws flush, not overdriven, or you’ll weaken the surface and create avoidable failure points.
Choosing Proper Fasteners
Fasteners may seem minor, but they can make or break a siding job. You need the right type, length, and corrosion resistance for your siding and climate. If you pick nails or screws that don’t match the material, you risk loosening, splitting, or visible damage that hurts your home’s finish and protection.
Use fasteners approved by the siding manufacturer.
Choose stainless steel or hot-dipped galvanized options for durability.
Match fastener length to the substrate for solid hold.
You also want heads that seat cleanly without crushing the panel. When you select hardware with care, you join the group of installers who build siding that stays secure, looks sharp, and lasts longer.
Correct Fastener Spacing
Correct fastener spacing is just as important as the fastener type, because too few or too many fixings can cause siding to buckle, gap, or loosen over time.
You need to follow the manufacturer’s layout for each panel, board, or shingle, since every system moves differently. Mark your studs or nailing strips before you start so you can keep your rhythm and stay consistent across the wall.
Space fasteners evenly, and keep them aligned so the siding sits flat and secure. If you crowd fixings, you can restrict movement; if you spread them too far apart, you invite flutter and strain.
When you work with the right spacing, you help your siding perform as a team with the building, giving your project a clean, lasting finish.
Preventing Overdriven Nails
When a nail is driven too deep, it can pinch the siding and keep the panel from moving as designed, which often leads to distortion, cracking, or visible surface damage. You can avoid this by using the right fasteners, setting your nail gun to the proper depth, and leaving a small gap so panels can expand and contract.
Check your work as you go, because a few overdriven nails can compromise an entire wall and make you feel like you missed a basic step.
- Match fasteners to the siding material.
- Stop when the nail head sits snug, not buried.
- Keep spacing even to support proper movement.
If you stay attentive, you’ll protect the finish, improve performance, and join other homeowners who get lasting results from careful installation.
Prevent Gaps, Warping, and Buckling
A few small installation errors can lead to big siding problems, so you need to leave proper expansion space, keep each course level, and secure panels without overdriving fasteners.
When you fit pieces too tightly, the material can’t move with temperature changes, and that’s when gaps, warping, and buckling start. Check every row as you go, and correct any drift before it compounds.
You should align joints cleanly, maintain consistent reveals, and follow the manufacturer’s spacing requirements at every seam. If a panel feels forced into place, stop and reset it instead of tightening your way through the mistake.
Careful spacing and steady alignment help your siding stay flat, look polished, and perform the way your crew expects, season after season, with fewer callbacks and a more confident finish.
Siding Mistakes Around Windows and Doors
Around windows and doors, small installation mistakes can quickly lead to leaks, drafts, and trim failure if you don’t plan the details carefully.
You should measure each opening, flash it correctly, and keep siding clear of moving parts so your work fits the opening, not fights it. When you belong to a crew that values clean details, you protect every edge.
Watch for these common errors:
- Placing siding too tight against frames
- Skipping proper flashing and sealant changes
- Cutting panels unevenly around trim
You can avoid trouble by leaving expansion space, aligning trim pieces, and sealing only where the manufacturer allows.
Take time on corners and heads, and your finished wall will look sharp, shed water well, and stay dependable season after season.
How to Inspect Siding Before Completion
Once the siding is in place, inspect every course before you call the job complete.
Walk the perimeter and check that each panel sits straight, locks securely, and lines up with the courses above and below it. Look for gaps, lifted edges, missed nails, or fasteners driven too tight.
Verify that seams stagger properly and that trim, corners, and flashing shed water instead of trapping it. You should also confirm that caulking is neat, vents stay clear, and cut ends are sealed where needed.
Run your hand along the surface to catch waves or soft spots. If something looks off, fix it now.
Careful inspection helps you protect your home, avoid callbacks, and finish with the confidence that comes from doing the work right together.
Frequently Asked Questions
How Often Should Siding Be Inspected After Installation?
You should inspect your siding at least once a year, and after major storms. Check for cracks, loose panels, gaps, and moisture. If you spot damage, act quickly to protect your home and neighbors.
What Siding Material Lasts the Longest in Harsh Climates?
Fiber cement siding usually lasts longest in harsh climates. You’ll get excellent resistance to moisture, fire, pests, and temperature swings. If you want durability and a strong curb appeal, it’s a smart, long-term choice.
Can Siding Be Installed in Cold Weather?
Yes, you can install siding in cold weather, but you’ve got to work carefully. You’ll need manufacturer-approved temperatures, proper storage, and tight handling; otherwise, materials crack, shift, or refuse to seal.
How Do I Choose a Qualified Siding Contractor?
You should choose a qualified siding contractor by checking licenses, insurance, references, and local reviews. Ask about experience, warranties, and materials, then compare detailed bids. You’ll feel confident when they communicate clearly and answer questions.
What Maintenance Extends Siding Lifespan?
Regularly wash your siding, inspect caulk and paint, clear debris, and repair cracks fast. You’ll protect your home, reduce moisture damage, and keep your exterior looking strong as a fortress for years.
Summary
If you rush siding like stacking stones in a storm, the wall may look finished but won’t stand strong. You can avoid that fate by checking flashing, fasteners, spacing, and level courses before the job wraps up. When you inspect each seam and opening now, you protect your home from leaks, buckling, and wasted energy later. Finish carefully, and your siding won’t just cover your house—it’ll guard it, year after year.