
You might think understanding the roof installation timeline isn’t necessary, but being informed can save you time and stress. Knowing what to expect can help you plan better and avoid surprises. From the initial consultation to the final inspection, each step plays a vital role. Let’s explore the process, ensuring you’re well-prepared for what lies ahead and how to navigate potential challenges that may arise.
Key Takeaways
- The roof installation process starts with an initial consultation to assess needs and materials.
- Installation typically takes a few days, depending on weather conditions and site readiness.
- Old roof removal and necessary repairs must be completed before new material installation.
- A final inspection ensures compliance with building standards and project quality.
- Flexibility in scheduling is crucial to accommodate potential weather-related delays.
Understanding the Roof Installation Timeline
When you’re planning a roof installation, understanding the timeline is essential for a smooth process. A typical roofing timeline includes several key installation phases, each taking specific timeframes.
First, you’ll need to schedule a consultation to assess your needs and discuss materials. Once you finalize your choices, the actual installation can begin, usually taking a few days. Weather can influence progress, so it’s wise to allow for some flexibility.
During the installation phases, the old roof is removed, any repairs made, and the new materials are installed layer by layer. Finally, a thorough inspection verifies everything meets standards.
What to Expect During Your Initial Consultation?
After grasping the roofing timeline, it’s time to focus on your initial consultation. This meeting is essential for setting the stage for your project.
Expect an initial assessment where the contractor evaluates your roof’s condition, discussing any visible issues. They’ll also ask about your client expectations, ensuring they align with your vision and budget.
You’ll share your ideas and preferences, allowing the contractor to provide tailored recommendations. Don’t hesitate to ask questions; this is your opportunity to clarify any concerns.
Together, you’ll outline the next steps, including timelines and potential materials. By the end of this consultation, you should feel informed and confident in the direction of your roofing project, fostering a sense of partnership as you move forward.
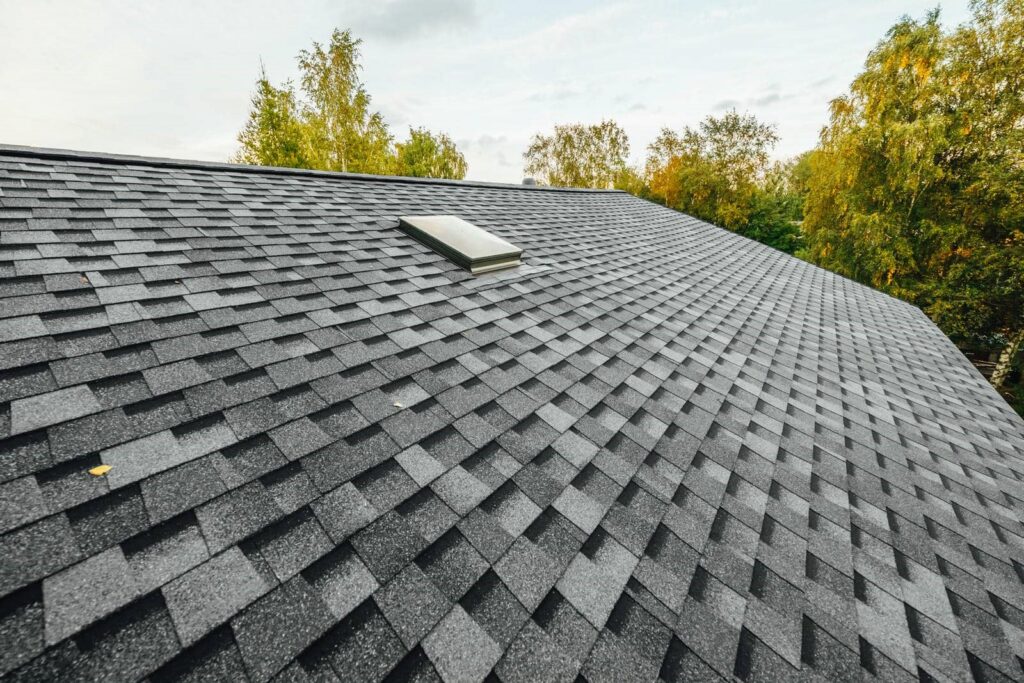
Choosing Quality Materials for Roof Installation
Choosing quality materials for your roof installation is essential to ensuring durability and long-term performance. When selecting materials, consider their lifespan and resistance to weather conditions.
Asphalt shingles, for example, offer a good balance of affordability and material durability, while metal roofing can provide longevity and energy efficiency.
It’s also wise to conduct a cost comparison between different materials, factoring in installation costs and potential maintenance over time.
For instance, while a higher upfront cost for premium materials may seem intimidating, the long-term savings on repairs and energy bills can make them a worthwhile investment.
Navigating Permits and Inspections for Your Roof Installation
Steering through permits and inspections for your roof installation can feel intimidating, but understanding the process is essential for a successful project.
Here’s how to navigate it effectively:
Permit Acquisition: Start by checking local regulations to determine which permits are necessary. This varies by location, so don’t skip this step.
Documentation: Gather all required documents, including plans and specifications. Having everything organized will streamline the approval process.
Inspection Readiness: Prepare your site for inspections by ensuring all work complies with building codes.
Schedule inspections promptly to avoid delays.
How Weather Affects Your Installation Schedule
Weather plays a significant role in your roof installation schedule. Understanding local weather patterns and seasonal impacts can help you plan effectively. For instance, heavy rain or snow can delay your project, while excessive heat might compromise materials.
Here’s a quick reference table to visualize how different weather conditions can influence your timeline:
| Weather Condition | Impact on Installation | Suggested Action |
|---|---|---|
| Rain | Delays and safety risks | Reschedule work |
| Snow | Unsafe conditions | Wait for melting |
| High Heat | Material damage | Plan for cooler hours |
Installation Process Overview
In the installation process, you’ll start with essential preparations to ensure everything runs smoothly.
Once you’ve set the groundwork, you can move on to the detailed steps of the actual installation.
Understanding these phases will help you stay organized and on track throughout the project.
Preparation Phase Essentials
Before diving into the roof installation process, it’s vital to understand the preparation phase essentials. Proper preparation sets the stage for a successful installation, ensuring everything goes smoothly.
Here are three key items to focus on:
Site Assessment: A thorough evaluation of your home’s structure and surrounding environment helps identify potential challenges and ensures safety.
Choosing Roofing Materials: Selecting the right materials for your specific climate and aesthetic preferences is vital. Consider durability, cost, and style.
Permits and Regulations: Check local building codes and obtain necessary permits to avoid fines and ensure compliance with safety standards.
Installation Steps Breakdown
With the preparation phase complete, you’re ready to tackle the installation steps that will bring your new roof to life.
First, it’s essential to choose the right roof type—whether asphalt shingles, metal, or tiles—based on your home’s needs.
Next, familiarize yourself with various installation techniques specific to your chosen material. For example, asphalt shingles require overlapping placement, while metal roofs might need specific fastening methods to ensure durability.
As you proceed, verify proper underlayment and flashing are in place to protect from leaks.
Finally, don’t forget to clean up debris after completion.
Avoiding Common Delays in Your Roof Installation
While unexpected issues can arise during roof installation, you can take proactive steps to avoid common delays.
Effective planning and clear communication with your contractor are key to a smooth process. Here are three strategies to evaluate:
Material Sourcing: Confirm that all materials are ordered well in advance to prevent last-minute shortages or delays in delivery.
Contractor Communication: Maintain open lines of communication with your contractor throughout the project. Regular updates can help identify potential issues before they escalate.
Weather Monitoring: Keep an eye on weather forecasts. If bad weather is expected, schedule work accordingly to minimize interruptions.
Final Inspection and Quality Assurance
Once your roof installation is complete, it’s essential to conduct a thorough final inspection to confirm everything meets quality standards. This step ensures that all materials are properly installed, and any potential issues are addressed before you move on.
Walk through the space with your contractor, checking for loose shingles, proper flashing, and secure ventilation systems. Don’t hesitate to ask questions; this is your chance to ensure your home’s protection.
Document any findings and discuss solutions on the spot. By prioritizing this final inspection, you’re safeguarding your investment and fostering a sense of belonging and pride in your home.
A job well done means peace of mind for years to come.
Preparing Your Home for Installation Day
Clear the Area: Remove vehicles and any outdoor furniture near your home. This gives the crew ample space to work safely.
Secure Valuables: Move any fragile items and valuables indoors. This protects them from accidental damage during the installation.
Communicate with Neighbors: Let your neighbors know about the installation. Sharing roof maintenance tips can foster a sense of community and understanding.
As a responsible homeowner, you’ll enhance the installation experience while maintaining a positive environment for everyone involved.
Frequently Asked Questions
How Do I Choose the Right Roofing Contractor?
To choose the right roofing contractor, check their qualifications, read reviews, and request detailed project estimates. Compare bids carefully, ensuring clear communication about timelines and materials. Trust your instincts to find the best fit for you.
What Financing Options Are Available for Roof Installation?
Financing options for roof installation are like a toolbox; you’ve got various loan types, from personal loans to home equity lines. Budgeting tips can help you manage payments effectively, ensuring your project stays within reach.
Can I Stay in My Home During Installation?
Yes, you can stay in your home during installation, but be prepared for noise levels and safety precautions. Consider designating a quiet area away from the work zone to ensure comfort and safety for everyone.
How Long Is the Warranty for My New Roof?
Your new roof’s warranty duration typically ranges from 20 to 50 years, depending on the materials. To maximize its lifespan, follow maintenance tips like regular inspections and prompt repairs for any damage you notice.
What Should I Do if I Experience Leaks After Installation?
If you experience leaks after installation, first identify potential roof leak causes. Many leaks originate from improper flashing. Consider leak repair options like sealing or replacing damaged areas, and contact your contractor for assistance.
Summary
As you prepare for your roof installation, remember that the timeline can shift unexpectedly. You’ve planned, chosen materials, and scheduled inspections, but what happens if the weather turns? Just when you think everything’s in place, a rainstorm might threaten to delay your project. Stay flexible and communicate with your contractor to navigate these challenges. With a keen eye on quality and a readiness for surprises, you’re on the path to a new roof that protects your home for years to come.