
When you spot a roof leak, the clock starts fast, and the wrong repair can make the damage worse. You need to trace the source, check the attic, and choose a fix that holds under real weather, not just for a day. Temporary patches can buy time, but the lasting answer depends on the leak location, the roof material, and how well you handle the weak points most people miss.
Key Takeaways
- Inspect ceilings, attic stains, vents, chimneys, and flashing to trace the leak’s true source before repairing anything.
- Use emergency tarps or quick sealant patches to stop water intrusion until permanent repairs can be completed.
- Repair vent boots, flashing, seams, drains, and punctures with compatible materials and test the fix for leaks.
- Protect the interior by moving valuables, catching drips, and drying wet areas quickly to reduce mold and structural damage.
- Maintain gutters, shingles, and sealants regularly, and call a roofer if leaks keep returning or hidden damage is suspected.
Spot the Roof Leak Before It Spreads
How do you catch a roof leak before it causes wider damage? You inspect your ceiling, walls, and eaves after heavy rain, looking for stains, bubbling paint, damp insulation, or musty odors.
You also check flashing, shingles, vents, and gutters from the ground for gaps, lifted edges, or debris buildup. If you spot active dripping, place a bucket and protect nearby surfaces right away.
Then document the location and size of the damage so you can track changes. These quick roof leak repair solutions buy you time and help you act before rot, mold, and structural wear spread.
You’re not handling this alone; careful observation and fast response put you in control and keep your roof in the safe zone.
Find the Leak Source in Your Attic
In your attic, trace water stains back to their highest point to narrow the leak path.
Check roof penetrations like vents, chimneys, and pipes for damp framing or active moisture, then inspect flashing joints for gaps, corrosion, or lifted edges.
These details usually show you where water enters, not just where it drips.
Trace Water Stains
Water stains act like breadcrumbs, showing you where roof water traveled before it dripped below. In your attic, follow each mark uphill, because water often runs along framing before it pools. You’ll narrow the source faster when you compare color, shape, and spread.
Look for:
- dark rings around old staining
- fresh sheen on wood or insulation
- streaks that angle away from the leak
- damp insulation compressed under weight
- mold growth at repeated wet spots
Mark each clue with tape so you can map the path. If the stain widens after rain, you’ve confirmed active movement.
Stay methodical, and you’ll fit in with crews that solve leaks by evidence, not guesswork. This approach saves time, supports targeted repairs, and keeps your roof system working longer.
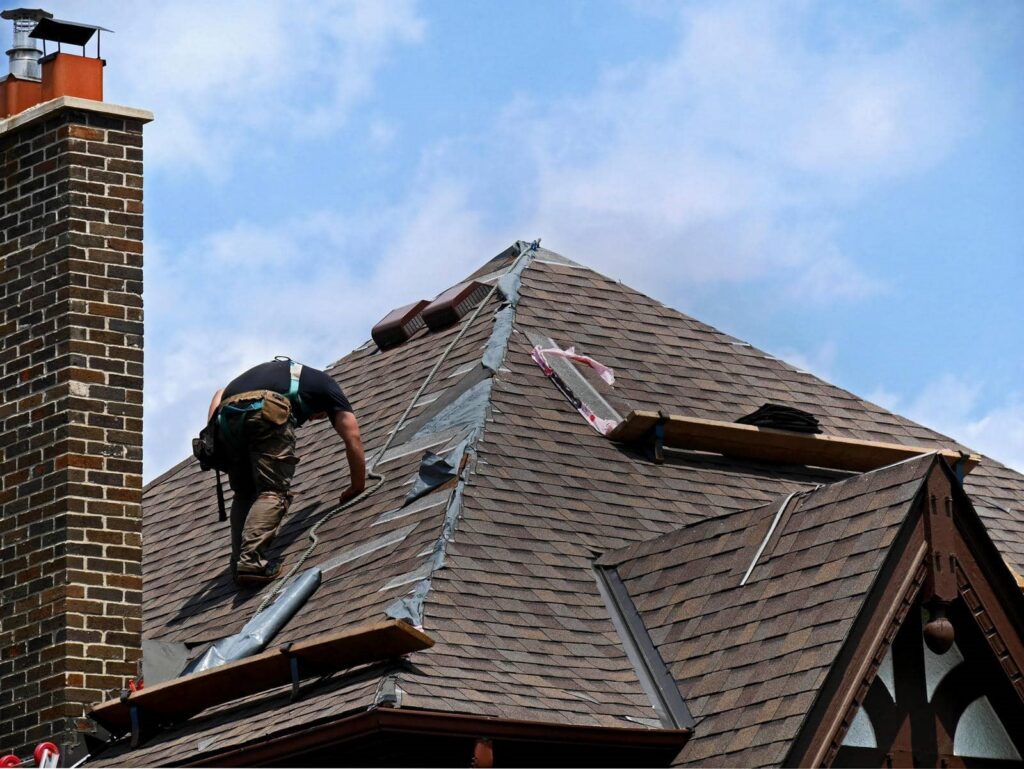
Check Roof Penetrations
Next, inspect every roof penetration in your attic because gaps around vents, chimneys, skylights, and pipes often let water enter. You’ll usually spot damp framing, darkened sheathing, or mineral streaks around these openings.
Use a flashlight and follow the wet path upward until it stops at the source. Check for cracked boot collars, loose pipe seals, damaged vent housings, and missing caulk around curbs. If you see daylight, that opening needs attention.
Mark each suspect spot with tape so you can return with materials later. Stay systematic and work one penetration at a time; that keeps you in control and helps your repair team stay aligned.
A careful attic check often reveals the leak faster than searching the roof below.
Inspect Flashing Joints
Once you’ve ruled out vents, pipes, and skylights, inspect the flashing joints where roof sections meet in the attic. You’re looking for gaps, rust, lifted edges, and water stains that track along framing. Use a flashlight and trace any damp insulation back to the seam.
- Check step flashing at wall intersections
- Inspect valley flashing for splits or debris
- Look for dried sealant or failed caulk
- Confirm fasteners haven’t backed out
- Note staining patterns for leak direction
If you spot movement or corrosion, you’ve found a likely entry point. Temporary patching can slow the leak, but you’ll usually need resealing or replacement for lasting protection.
When you document the damage clearly, you’re working like the rest of us who want a dry, dependable roof.
Make Temporary Roof Leak Repairs Fast
When you spot an active roof leak, you should cover the damaged area with a secured emergency tarp to block further water intrusion.
Next, you can apply a compatible quick-sealant patch to small cracks, lifted shingles, or flashing gaps to slow the leak.
These fixes buy you time until you can complete a permanent repair.
Emergency Tarp Coverage
If the leak is active, you can stop immediate water intrusion with an emergency tarp before you make a permanent repair. Choose a tarp that extends at least 3 feet past the damaged area on all sides, and position it so runoff sheds over the eave. You’ll work faster and safer when you secure the edges with battens or sandbags instead of loose nails.
- Clear debris from the roof surface
- Inspect for sharp edges before climbing
- Cover the ridge when possible
- Anchor the tarp tightly at perimeter points
- Check inside for continuing drips
Keep the tarp taut, but don’t overstretch it. Recheck it after wind or rain, since movement can open gaps. This is a reliable stopgap for your crew and your home.
Quick Sealant Patching
Quick sealant patching lets you stop small roof leaks fast by sealing the crack, seam, or fastener hole before water spreads further.
You should clean the area, dry it fully, and remove loose debris so the sealant bonds well. Use roofing-grade sealant or elastomeric caulk, then press it into the opening and spread it beyond the damaged spot.
If the gap’s wider, add a patch strip or mesh for reinforcement. Work in dry weather whenever you can, and inspect the repair after the next storm.
This fix gives you temporary protection, not a permanent cure, but it keeps your home safe while you plan the full repair.
When you handle it carefully, you join the group of homeowners who stay ahead of damage.
Fix Leaks Around Roof Vents
Roof vents often leak because the flashing, rubber boot, or sealant has cracked, loosened, or pulled away from the pipe. You can stop the drip by inspecting the vent from the attic and roof, then correcting the failed part fast.
Act with your crew mindset: one careful repair protects everyone under the roof.
- Clean dirt and old caulk from the area.
- Check for torn boot edges or split metal.
- Tighten loose fasteners without overdriving them.
- Replace brittle rubber boots that no longer flex.
- Test the vent with a hose after repairs.
If you spot rot, mold, or repeated leakage, you’ll need a deeper fix.
For now, focus on the vent assembly, keep the opening dry, and restore a tight seal that lasts.
Seal Shingles and Flashing the Right Way
When shingles or flashing have small gaps, you can seal them with roofing cement or a compatible roof sealant to block water fast, but this is usually a short-term repair, not a cure.
You should lift the loose edges carefully, clear out grit, and dry the area so the sealant bonds well. Then press the shingle back into place and cover exposed nail heads, seams, and flashing joints with a thin, even bead.
Don’t smear on too much; excess traps debris and weakens adhesion. For cracked shingles, patch only if the damage is minor and the roof is otherwise sound.
If you’re fixing the flashing, make sure it sits tight against the surface. These small, smart repairs help your roof team keep moisture out and protect your home.
Repair Flat Roof Leaks and Ponding Water
Flat roofs need a different approach because water tends to sit on them, so you should trace leaks to seams, drains, membrane punctures, and low spots where ponding occurs.
You’ll fix the problem faster when you work methodically and keep your crew aligned on each step.
- Clear debris from drains and scuppers
- Cut out wet insulation around the leak
- Patch punctures with compatible membrane material
- Reinforce open seams with manufacturer-approved tape
- Build slope with tapered insulation to reduce ponding
If the surface keeps holding water after rain, don’t just smear on more coating.
You need to restore drainage and repair the membrane system together. That approach gives your roof a tighter, longer-lasting defense and helps your team stay ahead of repeat failures.
Prevent Interior Water Damage
Even a small roof leak can spread fast, so you should protect the interior as soon as you spot water intrusion. Move furniture, rugs, and electronics out of the drip zone, then place plastic sheeting or waterproof tarps under the leak path.
Use buckets with wide mouths to catch water, and line them with towels to cut splash. If ceiling drywall sags, keep the area clear and ventilated to reduce secondary damage.
Dry wet surfaces with fans and a dehumidifier to limit mold growth and staining. Remove soaked insulation and damaged drywall only after the area is stable.
Mark the leak location, photograph the damage, and keep affected members of your household informed. Fast containment helps you stay in control and protects the space you share.
Know When DIY Roof Leak Repair Fails
If your leak keeps returning after you patch it, you’re likely facing a persistent source that DIY fixes can’t seal.
You may also miss hidden structural damage, such as rotted decking or failed underlayment, that keeps water moving through the roof system.
When repairs fail more than once, you need a closer inspection and a longer-term repair plan.
Persistent Leak Sources
Persistent roof leaks usually signal a problem that patching alone won’t solve, especially when water keeps returning after you seal a visible crack or replace a few shingles.
You need to trace the entry point, not just the stain, because water can travel before it drips. Common persistent sources include:
- Failed flashing at chimneys
- Loose step flashing at walls
- Cracked pipe boots
- Open seams around vents
- Backed-up gutters and valleys
Check these areas after every rain, then dry the surface and mark fresh moisture.
If leaks keep showing up in the same zone, your repair likely needs more than caulk. You’re not alone here—many homeowners face the same pattern.
Focus on the source, use compatible materials, and call a pro when the leak resists repeated fixes.
Hidden Structural Damage
When a roof leak keeps coming back, the problem may be hidden structural damage beneath the surface. You might patch shingles, seal flashing, or replace underlayment, but saturated decking, warped rafters, and loose fasteners can keep water moving indoors.
Inspect the attic for dark stains, sagging sheathing, mold, or softened wood. Check for nail pops, split boards, and daylight around penetrations. If you notice any of these, stop relying on surface fixes.
You need a qualified roofer to assess load-bearing parts, replace damaged sections, and verify ventilation and drainage. That approach protects your home and helps you stay with the crew that values lasting repairs over quick patches.
Hidden damage spreads fast, so act before a small leak becomes a structural problem.
Recurring Repair Failures
Repeated leaks after a DIY patch usually mean the repair missed the real entry point or couldn’t hold up under weather and movement. You’re not failing; the roof is telling you the fix is incomplete.
Check for:
- cracked flashing
- loose fasteners
- failed sealant
- damaged shingles
- trapped moisture
If water returns after rain, wind, or freeze-thaw cycles, your patch is temporary. You need to trace the source, not just the stain.
Inspect seams, penetrations, valleys, and joints with steady light and safe access. Repeated failures often point to movement, aging materials, or hidden rot.
At that stage, a pro-grade repair can protect your home and your crew of neighbors better than another quick patch.
Pick Roof Repairs That Last
Pick repairs that solve the root cause, not just the symptom, so the leak doesn’t return after the next storm. You should match the fix to the failure: replace cracked flashing, reset loose fasteners, renew worn pipe boots, or patch damaged membrane with compatible materials.
If you only smear sealant over an active seam, you’re buying a short reprieve, not a real repair. Ask for a method that restores the full water barrier and seals all edges cleanly.
You belong with owners who document the damaged area, confirm the source, and insist on proper adhesion, overlap, and fastening.
A lasting repair also respects the roof system’s design, so the patched section moves, drains, and sheds water like the rest of the assembly.
Prevent Roof Leaks With Seasonal Maintenance
Seasonal maintenance helps you catch small roof problems before they turn into leaks. You’ll keep your roof in better shape when you inspect it in spring and fall, then act fast on damage.
Your routine should include:
- clearing gutters and downspouts
- checking flashing around vents and chimneys
- replacing cracked or missing shingles
- sealing exposed nail heads and joints
- removing debris, moss, and standing water
You don’t need a complex process; you need consistency. Walk the roof line, note wear, and fix issues before weather stress spreads them.
When you stay ahead of moisture, you protect insulation, framing, and interior finishes. That’s how you stay in the group of owners who avoid repeat repairs and get longer-lasting performance from their roof.
Frequently Asked Questions
How Much Does Professional Roof Leak Repair Usually Cost?
You’ll usually pay $300-$1,500 for professional roof leak repair, depending on leak size, roof type, and damage. You should expect higher costs for structural issues, flashing replacement, or emergency service.
Can Roof Leaks Cause Hidden Mold Inside Walls?
Yes—roof leaks can hide mold inside your walls, feeding dark, damp cavities like a silent storm. You’ll want prompt repairs, moisture checks, and insulation inspection to protect your home, health, and peace of mind.
How Long Should a Repaired Roof Leak Last?
A proper roof leak repair should last 5–20 years, depending on materials, workmanship, and weather. You’ll get longer protection if you replace damaged flashing, seal penetrations, and inspect the roof regularly.
Does Homeowner’s Insurance Cover Roof Leak Damage?
Usually, you’ll get coverage if a sudden event caused the leak, but not for wear, neglect, or poor maintenance. You should review your policy, document damage, and file promptly to protect your claim.
When Is Roof Replacement Better Than Another Repair?
When repairs become a band-aid, you should replace the roof if leaks keep returning, decking rots, shingles fail broadly, or costs near 60% of replacement. You’ll gain stronger protection, better resale, and peace of mind.
Review
You’ve followed the map through the storm, and now the roof tells its truth: a small crack can become a flood if you ignore it. When you inspect early, patch fast, and seal vents, flashing, and shingles with care, you keep the house steady. If the damage outpaces your tools, call a pro. Stay on top of gutters, ventilation, and seasonal checks, and you’ll stop leaks before they turn your ceiling into a warning.