
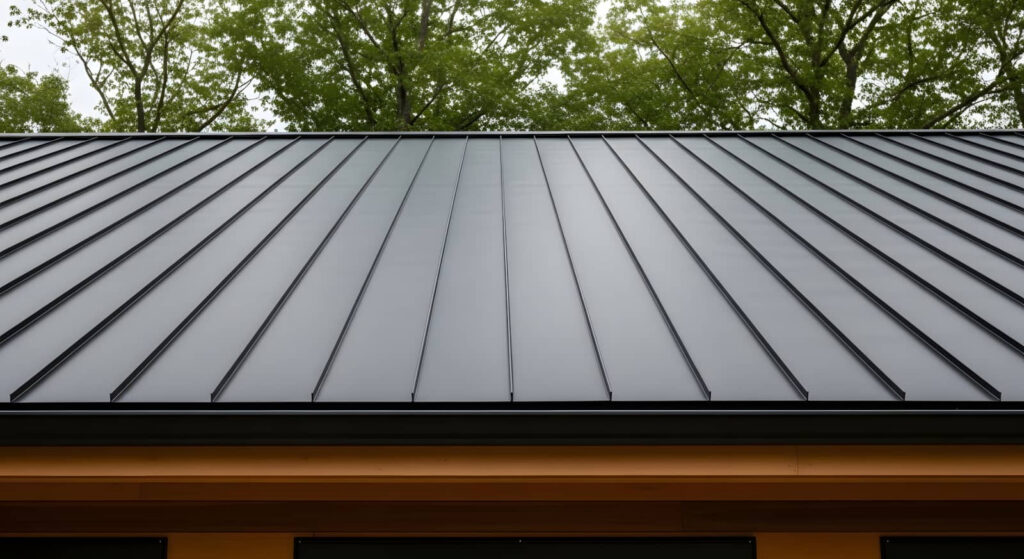
A metal roof looks simple from the ground, but the metal roofing installation process depends on precise preparation and fastening. You start by checking the deck, then add underlayment and flashing where water can sneak in. After that, you measure, cut, and secure each panel so it can move with temperature changes. The real difference shows up in the details, and that’s where most roofs either hold up or fail.
Key Takeaways
- Inspect and prepare the roof deck, removing old roofing, debris, rot, and uneven areas before installation begins.
- Install underlayment and flashing first to create a moisture barrier around edges, valleys, vents, and penetrations.
- Measure, mark, and cut panels accurately so they fit each roof plane with proper overlap and thermal movement allowance.
- Set starter trim, then fasten metal panels from eave to ridge in the manufacturer’s required pattern and torque.
- Finish with ridge caps, trim, sealant, and a full inspection to confirm tight seams, seated fasteners, and no visible defects.
Metal Roofing Installation Process
A properly planned metal roofing installation process starts with a careful inspection of the roof deck, underlayment, flashing details, and fastener layout. You’ll verify that each panel lines up cleanly, so your system sheds water and resists wind uplift.
Next, you’ll set the starter trim, place panels from eave to ridge, and fasten them with the correct pattern and torque. You’ll keep seams aligned and laps tight, because small errors can invite leaks.
At penetrations, you’ll fit closure pieces and sealant where the manufacturer calls for them. Then you’ll install ridge caps, trim ends, and check every exposed edge.
When you follow the metal roofing installation process this way, you join a crew of owners who value durability, fit, and long-term performance.
Metal Roof Prep Before Installation
Before you install metal roofing, inspect the roof deck for rot, soft spots, loose fasteners, and uneven areas that could affect panel performance.
You’ll also need to remove the existing roofing material and clear all debris so the new system sits on a clean, stable base.
Next, prepare the underlayment to provide a smooth moisture barrier and proper support for the metal panels.
Roof Deck Inspection
Your installer starts the metal roofing process by thoroughly inspecting the roof deck for rot, soft spots, loose fasteners, and uneven areas.
You’ll want a sound deck because every panel depends on it for flatness, support, and long-term hold. The crew checks sheathing thickness, spacing, and structural alignment, then marks any sections that need repair or reinforcement.
They also look for sagging, delamination, moisture damage, and fastener pull-through risk. If the deck isn’t level, the finished roof can telegraph flaws, create noise, and reduce weather performance.
This step helps your whole roofing team work from the same standard: a clean, stable base. When the deck passes inspection, you’re ready for the next phase with confidence and fewer surprises.
Old Material Removal
Once the deck passes inspection, the crew removes the old roofing materials so the new metal system can go on a clean, stable surface.
You’ll see shingles, nails, flashing, and other debris loaded out quickly to keep the work area safe and organized. The team uses pry bars, shovels, and magnets to limit damage and catch stray fasteners.
You stay informed because a clear roof deck helps the next phase move smoothly.
- Strip materials from ridge to eave.
- Remove loose fasteners and old sealants.
- Inspect exposed sheathing for hidden issues.
- Haul debris away to keep access clear.
This step helps your project team work like one crew, with fewer delays and fewer surprises.
Underlayment Preparation
With the deck cleaned and inspected, the crew installs the underlayment to add a critical moisture barrier beneath the metal panels. You’ll see synthetic sheets or peel-and-stick membrane laid flat, overlapped correctly, and fastened to stay secure in wind and heat.
The team keeps every seam straight so water can’t track through gaps. At valleys, eaves, rakes, and penetrations, they add extra coverage because those areas take the most abuse. You’re building a roof system that works together, so this step matters as much as the panels themselves.
If your crew spots soft decking, raised nails, or uneven edges, they fix them now before the metal goes on. Good underlayment prep helps your roof last longer and keeps your home protected from hidden moisture.
Why Underlayment and Flashing Matter
Underlayment and flashing do the critical work of sealing the roof deck before the metal panels go on. You rely on them to block moisture, guide runoff, and protect joints where leaks usually start.
When you install them correctly, you’re building a tighter, longer-lasting roof system with your crew.
- Underlayment adds a second barrier against wind-driven rain.
- Flashing seals valleys, edges, vents, and connections.
- Both help manage thermal movement and reduce water intrusion.
- Careful overlap and fastening keep the assembly secure.
You don’t want shortcuts here, because small gaps can spread damage fast.
If you’re part of a solid roofing team, you know these details separate a dependable roof from one that fails early.
How Panels Are Measured and Cut
Next, you measure each roof plane carefully so the panels fit cleanly and shed water as designed. You check ridge-to-eave length, confirm square, and note every valley, dormer, vent, and edge condition.
Then you transfer those dimensions to each panel layout, allowing for thermal movement, trim, and the manufacturer’s required overhang. You mark cut lines with a straightedge and use tools that won’t distort the metal, keeping factory edges intact when you can.
At junctions, you trim deliberately so laps stay true and seams line up. You also label panels by location, which keeps your crew organized and reduces mistakes on the roof.
Careful measuring and cutting help your system look sharp, perform well, and feel like a job your team can trust.
How Metal Panels Are Fastened
Once the panels are measured and cut, you fasten them according to the roof system’s clip or exposed-fastener layout.
You align each panel, then drive screws or engage clips at the specified points so the sheet can move as designed. Use the correct bit, set the fastener square, and stop when the washer seats firmly without crushing it.
Work from the eave upward and keep each row consistent so the field stays tight and true.
- Check fastener spacing against the manufacturer’s pattern.
- Keep panels aligned before every screw goes in.
- Replace any stripped or tilted fastener immediately.
- Recheck torque so your team finishes with confidence.
How Contractors Handle Vents and Edges
Around vents and roof edges, you trim panels carefully so every penetration and termination stays watertight. You measure twice, then cut clean openings so flashings sit flat and seal tight.
At pipes, skylights, and exhaust vents, you fit compatible boots or metal flashing, then fasten them with approved sealant and screws. Along rake edges, eaves, and ridges, you install trim pieces that cover exposed panel ends and guide water away from vulnerable seams.
You keep panel hems aligned, avoid pinching gaskets, and leave the right expansion space so the roof can move without tearing seals. When you work this way, you and your crew build a crisp, durable edge detail that protects the whole roof and fits the system as intended.
Final Metal Roof Inspection Checklist
Final inspection is the last quality check before the roof goes into service. You and your crew should verify every panel, fastener, and trim detail before signoff.
Walk the roof methodically, document findings, and correct issues while access is still safe. This step keeps everyone on the same page and confirms the system meets spec.
- Check panel alignment, lap engagement, and consistent reveal.
- Confirm fasteners are seated, straight, and properly spaced.
- Inspect sealant, closures, and penetrations for full coverage.
- Look for scratches, dents, loose trim, and debris removal.
From the ground, review lines and edges for uniform appearance.
Inside, confirm no visible light, gaps, or missed attachments.
When you finish, you’ll know the roof is ready and your team delivered clean, professional work.
How Proper Installation Extends Roof Life
Proper installation extends a metal roof’s service life by controlling the details that most often cause early failure. You get better performance when panels align correctly, fasteners seat to spec, and seams lock without stress.
That precision limits water intrusion, wind uplift, and thermal movement damage. When you install underlayment, flashings, and closures the right way, you protect the deck and keep moisture from spreading into the system.
You also reduce panel noise, oil canning, and corrosion points, which helps your roof stay stable through weather swings. If you’re part of a team that values quality, these steps aren’t optional—they’re how you build trust in every square.
In short, good installation adds years by preventing small defects from becoming costly failures.
Final Thoughts
When you install a metal roof correctly, you’re not just nailing panels in place—you’re building a system that sheds water, moves with temperature, and stands up to weather. From prep to flashing to final inspection, every step matters. Skip one detail, and the whole roof can fail like a chain with one weak link. Do it right, and you’ll extend the roof’s life, protect the deck, and keep the structure sound for years.