
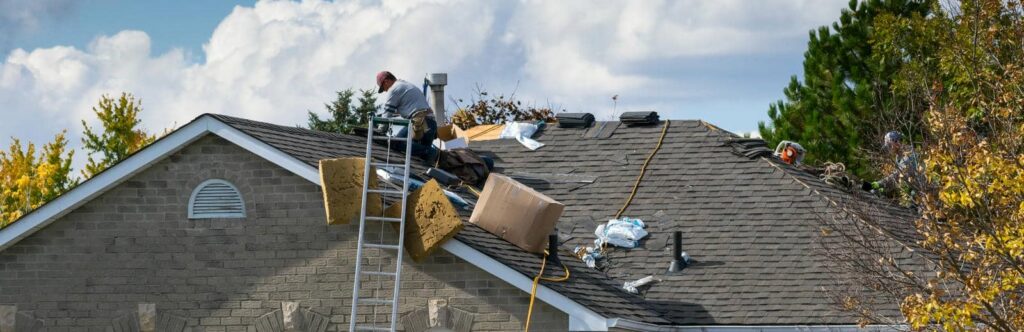
After a hailstorm, you need to inspect your roof for more than obvious dents. Check shingles for bruising, cracked tabs, and granule loss, then look at gutters, flashing, vents, skylights, and chimneys for impact marks. Don’t ignore the attic or ceilings, either, since leaks often show up there first. A quick survey can tell you whether you’re dealing with minor wear or damage that needs immediate repair.
Key Takeaways
- Inspect shingles for dents, bruises, cracks, granule loss, lifted edges, and soft spots.
- Check gutters, downspouts, flashing, vents, skylights, and chimneys for impact damage or gaps.
- Look inside the attic for leaks, damp insulation, stains, daylight, or moisture after the storm.
- Photograph all damage and save weather reports, contractor notes, and repair estimates for insurance claims.
- Use emergency tarping if needed, and call a roofer quickly for exposed underlayment or structural damage.
What Hail Damage Looks Like on a Roof
Hail can leave a roof looking bruised, cracked, or stripped of granules, and you should inspect for dented shingles, soft spots, exposed underlayment, and damaged flashing after a storm.
You’re not alone if you spot these signs; many homeowners learn about hail damage roof repair only after weather hits hard.
Look for impact marks on metal vents, gutters, and drip edges, since hail often dents them before it tears roofing material.
Check for missing sealant at seams and around penetrations, because impacts can loosen those areas.
If you see daylight in the attic or feel moisture, act fast.
Document the damage with photos, then contact a trusted roofing pro for a focused assessment and next steps.
Check Shingles for Bruises, Cracks, and Granules
Start by examining each shingle for dark bruises, hairline cracks, and areas where granules have washed away, because hail impact can weaken the surface even when the roof still looks intact.
You should look for soft spots that feel spongy under light pressure, since those marks often indicate bruised matting beneath the surface.
Check for lifted edges, split tabs, and exposed asphalt that can speed up wear.
If you see shiny patches where granules are missing, note their location and size.
Take clear photos and compare damaged shingles to nearby ones so you can track patterns across the roof.
When you spot multiple affected areas, you’re not overreacting; you’re documenting early failure points that matter during repair decisions and insurance reviews.
Check Gutters, Downspouts, and Flashing for Dents
Inspect your gutters for dents, bends, or crushed sections that can restrict drainage and signal hail impact.
Check downspouts for splits, misalignment, or loose joints, since damage there can cause leaks or pooling around the foundation.
Examine flashing for dents or gaps at roof edges, chimneys, and vents, because even small defects can let water enter.
Gutter Dent Inspection
After a hailstorm, a quick dent check helps you spot hidden roof damage before leaks start. Stand safely below and scan gutters, downspouts, and flashing for impact marks, bends, or scraped finish. Small dents can signal harder hits to nearby roofing parts, so don’t skip this step.
You’re not alone in missing subtle damage, but a careful look gives you a better read on your system.
- Look for round dimples along gutter runs.
- Check seams for buckling or separation.
- Inspect flashing for flat spots or creases.
- Note any spots where water might pool.
If you see scattered dents, document them with photos and dates. That record helps you track storm impact and talk clearly with a roof pro about next repairs.
Downspout Damage Signs
Next, check your downspouts for hail dents, bends, and split seams, since impact damage can restrict drainage and leave water backing up at the roof edge.
Look for flattened sections, loose elbows, crushed outlets, and fasteners that’ve pulled away from the wall. Run water through each line if you can; slow flow, leaks, or overflow show hidden obstruction or deformation.
Also inspect the gutter-to-downspout connection for pinched openings and crushed strainers. If your system includes extensions, make sure they still direct water away from the foundation.
Small dents may seem cosmetic, but they can collect debris and worsen flow. When you spot damage, document it and schedule repair so your roof system keeps working as a team during the next storm.
Flashing Dents And Gaps
Look closely at the flashing around chimneys, vents, skylights, and roof edges for dents, lifted seams, or open gaps after hail impact. These weak points protect your roof system, so even small strikes can let water enter and spread fast.
If you belong to a neighborhood checking roofs after a storm, inspect methodically and note every defect.
- Check for creases, punctures, or warped metal.
- Press gently near seams to spot loosened fasteners.
- Look for sealant cracks, missing caulk, or separation.
- Compare both sides of valleys and junctions for symmetry.
If you see exposed edges or daylight through joints, schedule hail damage roof repair soon. Fast action helps you protect decking, insulation, and interior finishes before leaks grow.
Look for Leaks in the Attic and Ceilings
Even a small hail strike can open a pathway for water, so check your attic and ceilings for fresh stains, damp insulation, drips, or daylight around roof decking and vents.
Move slowly through the space with a flashlight and inspect joists, sheathing, and ceiling corners. If you see dark rings, peeling paint, or soft drywall, mark the spot and note the time of the storm.
Catching moisture early helps you protect your home and stay in control. Press insulation lightly; if it feels heavy or clumped, it may be holding water.
In living areas, look for bubbling paint, sagging texture, or yellow patches. Take photos before you dry anything, then call a trusted roofer or insurer so your claim and repair plan stay aligned.
Check Vents, Skylights, and Chimneys Too
You should inspect vent caps for dents, cracks, or missing fasteners after hail.
Check skylight seals for splits or lifted flashing, and look for any gaps around the frame.
Examine chimney flashing for bends, separations, or sealant failure that could let water in.
Inspect Vent Caps
Hail often leaves telltale impact marks on vent caps, skylights, and chimney flashing, so inspect these roof penetrations closely after a storm. You’ll spot the most common damage by looking for dents, cracks, and displaced fasteners.
Use a flashlight and check from the ground first, then move safely onto the roof if you’re trained to do so.
- Look for bent metal on vent caps.
- Check for missing or loosened hardware.
- Note chipped coatings or exposed rust.
- Compare each unit to undamaged ones nearby.
If you see damage, document it with clear photos and measurements. Small defects can let wind-driven rain enter the system later.
A careful inspection helps you stay ahead of leaks and keeps your roof community strong.
Check Skylight Seals
After a hailstorm, check skylight seals for cracks, lifted flashing, and gaps where water can enter. Inspect the perimeter gasket, curb, and glass edge with a flashlight. Look for missing sealant, bruised roofing around the unit, and any discoloration that signals past leaks.
Run your hand along the frame if it’s safe; rough spots or loosened joints often mean impact damage. From inside, watch for damp drywall, dripping, or fogging between panes.
If you spot damage, document it before you patch or replace anything. You don’t need to do this alone—many homeowners in your area face the same post-storm issues, and a careful check now helps your roof system stay tight, dry, and ready for the next storm.
Examine Chimney Flashing
Next, inspect chimney flashing for lifted metal, separated seams, cracked sealant, and gaps where the chimney meets the roof deck. You’ll spot hail impact fast if you check the uphill side, step flashing, and counterflashing closely.
Use a flashlight and note any rust streaks, dented edges, or missing fasteners. If water can enter here, it can spread into the attic and insulation.
- Look for bent flashing panels
- Check sealant for splits
- Verify shingles around the base
- Scan vents and skylights nearby
You’re not alone in this process; most storm checks include these same weak points.
If you see damage, schedule hail damage roof repair soon. Quick action helps protect your roof system and keeps your home’s repair plan on track.
How to Document Hail Damage for Insurance
To support an insurance claim, you should document storm damage as soon as it’s safe to inspect the roof. Take clear photos of every affected slope, ridge, vent, and flashing detail, then shoot close-ups that show hail impacts, bruised shingles, cracked tabs, and granule loss.
Include wide shots that capture the roof’s location and the storm’s context, plus date-stamped images if your camera allows it. Write brief notes about the hail size, wind direction, and the time you found each defect.
Save weather reports, repair estimates, and any contractor observations in one folder. Keep your records organized so you can share them quickly with your adjuster and stay confident through the claim process.
If you’re working with neighbors, compare notes to strengthen your case.
How to Tarp a Roof After a Storm
After a storm, you should place an emergency tarp over the damaged roof area as soon as it’s safe to limit further exposure.
Secure the tarp along the roof edges with lumber and fasteners so wind can’t lift it.
This temporary barrier helps protect the structure from leaks until you can complete permanent hail damage roof repair.
Emergency Tarp Placement
When hail punches holes in your roof or tears away shingles, you need to tarp the damaged area quickly to limit water intrusion until repairs begin. Use a heavy-duty tarp that extends past the damage, and keep your tools ready before you climb. You’re protecting your home and keeping your crew safe.
Measure the damaged section from below first.
Roll the tarp loosely, then position it uphill.
Lay the tarp flat over the exposed area.
Check that the covered zone stays dry inside.
Work on a dry, calm day if you can, and don’t step on slick surfaces. If the roof feels unstable, stay down and call a pro.
A clean, tight tarp buys you time and helps your home stay in the repair-ready group.
Securing Roof Edges
Once the tarp is in place, secure the roof edges so wind can’t lift it and let water back under. Use 2×4 boards, sandbags, or capped nails at the perimeter, and fasten only into sound decking.
Keep fasteners straight and spaced evenly so the tarp stays flat and tensioned. Overlap the tarp past the damaged area, then fold excess material under the edge for a tighter hold.
Check corners first, since they take the most uplift. If your roof has steep pitches or fragile shingles, work from a stable ladder and ask a partner to steady the tarp. You’re protecting your home and your crew, so move deliberately.
After fastening, walk the perimeter and confirm every edge lies snug, secure, and ready for the next storm.
Temporary Leak Protection
To stop water intrusion fast, you need to tarp any exposed roof area as a short-term fix until permanent hail damage roof repair can begin. Choose a heavy-duty tarp that extends past the damaged section and reaches healthy shingles. Secure it with 1×3 battens, roofing nails, and screws into framing, not just loose decking. Keep the tarp flat so wind can’t lift it.
- Clear debris and loose shingles first
- Cover the ridge or damaged slope fully
- Fasten edges every 12 to 18 inches
- Check the attic for new drips after rain
If you’re unsure about footing or slope, call a licensed roofer.
Quick, careful tarping helps protect your home and keeps your repair crew working from a dry, stable starting point.
When to Call a Roofer for Hail Damage
If hailstones have dented shingles, cracked tiles, exposed underlayment, or knocked granules into gutters, you should call a roofer right away for a professional inspection.
Don’t wait for a leak to prove the damage; hail can weaken your roof before water shows up inside. You should also call when you see soft spots, lifted flashing, bruised shingles, or repeated strikes on vents, skylights, and ridge caps.
If your neighbors filed claims after the same storm, your roof likely needs a close look too. A roofer can document damage, assess risk, and tell you whether the roof still protects your home.
Acting fast helps you stay ahead of hidden problems and keeps your home in the community of safe, prepared homeowners.
What Hail Damage Roof Repair Usually Includes
Hail damage roof repair usually starts with a full inspection, then moves to the specific work your roof needs, such as replacing cracked or bruised shingles, resealing lifted flashing, repairing punctures, and addressing damaged vents, skylights, or ridge caps.
You’ll often see your roofer document each issue, match materials, and restore weatherproofing where impacts broke the seal.
Typical repairs may include:
- Shingle replacement
- Flashing reseal
- Leak patching
- Vent and ridge cap repair
You stay in control when you know what’s being fixed and why. Your crew should also check underlayment, seal exposed fasteners, and clear debris from valleys so water can drain properly.
When the work’s done, your roof should look consistent, shed water well, and feel ready for the next storm.
How to Prevent Future Hail Damage
Even after repairs, you can reduce future hail damage by upgrading weak points before the next storm hits. Choose impact-rated shingles, class 4 if your budget allows, and ask your contractor to nail them to manufacturer specs.
Replace brittle flashing, seal exposed fasteners, and reinforce roof edges, valleys, and penetrations where hail usually starts problems. Keep gutters clear so water doesn’t back up under damaged shingles. Trim overhanging branches to limit debris impact.
Schedule an annual roof inspection and after any major storm, because small dents can become leaks later. If your area gets frequent hail, add a roof underlayment with higher tear resistance.
These steps help your home stay in the safe, storm-ready group.
Frequently Asked Questions
How Can I Tell if Hail Damage Is Old or Recent?
You can tell hail damage is recent if bruises feel soft, granules look bright, and edges stay sharp. Old damage usually darkens, hardens, and blends in. Check gutters, vents, and shingles for matching aging signs.
Does Hail Damage Always Require Full Roof Replacement?
No, hail damage doesn’t always mean a full replacement—like a bruise on skin, some roof hits stay surface-level. You can inspect shingles, flashing, and decking, then choose repair or replacement with your contractor.
Will My Homeowners Insurance Cover Interior Storm Damage Too?
Usually, yes—if the storm caused the interior damage. You’ll need to document it, prevent further loss, and file promptly. Your policy may cover repairs, but exclusions, deductibles, and depreciation can reduce what you receive.
Can I Inspect Hail Damage Safely From the Ground?
Yes, you can inspect hail damage safely from the ground, and it’s smart to do so first. You’ll spot dents, missing shingles, and debris. If you suspect damage, you’ll need a pro up close.
How Long Does a Hail Damage Roof Repair Usually Take?
Usually, you’ll wait one to three days for minor hail damage roof repair, while larger jobs can take a week or more. You should expect weather, materials, and inspections to affect timing.
Recap
After a storm, you’re like a ship’s captain reading the sky’s warnings: every dent, bruise, and leak is a signal, not noise. If you inspect the shingles, flashing, attic, and roof penetrations right away, you can catch small failures before they spread. Quick repairs and documented damage keep your roof’s defenses intact. Don’t wait for the next storm to expose weak points—act now, and you’ll protect both your home and your peace of mind.